Kuesa Cluster Demo QML Example
Demonstrates the use of the Kuesa API in a real world application. This demo uses several features of the Kuesa API such as loading a glTF file, playing animations, instanced rendering, tracking 3D entities on a 2D overlay, and integration with QtQuick and Qt3D.
Overview
One of four modes can be selected via the menu on the left side:
- Showroom mode
- Static scenes
- Driver assistance
- Navigation
Showroom Mode
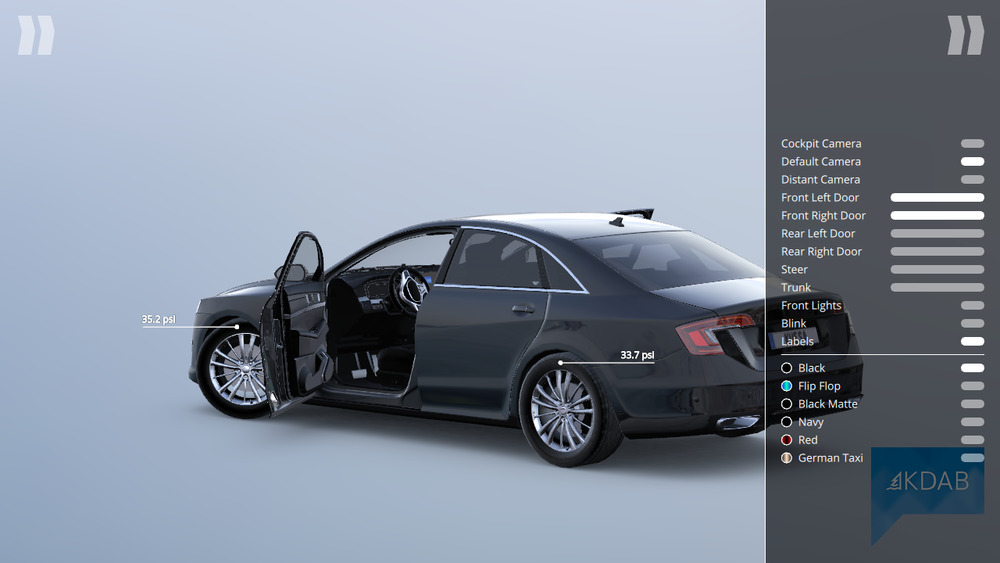
The showroom mode demonstrates importing a scene from a glTF file and introspecting the scene graph using the Kuesa API. The user interface is built dynamically based on information exported in the glTF file.
Controller
The C++ controller creates a SceneConfiguration which defines the glTF to be loaded, and a ViewConfiguration to configure the camera:
1 | |
Filename: cluster_demo/democontroller.cpp
When the scene is loaded, the controller queries the [SceneEntity ] element for several entities in the scene that will be exposed to QML UI layer:
- Materials that can be applied to the car by the user
- Labels that are overlayed on top of the scene and track components of the car
- Animations that can be activated by the user
QtQuick Interface
We use a [View3D ] element to display the 3D scene:
1 2 3 4 5 | |
Filename: cluster_demo/qml/SceneView.qml
The [activeScene ] property of the View3D element is bound to the sceneEntity property of the controller:
1 2 3 4 5 | |
Filename: cluster_demo/qml/SceneView.qml
Car Materials
The controller exposes the list of materials via the [materials ] property.
On the QtQuick UI layer, this property is used as a model for a Repeater element:
1 2 3 4 5 6 | |
Filename: cluster_demo/qml/SettingsPane.qml
When a material is selected on the UI, the controller applies it to the car materials:
1 | |
Filename: cluster_demo/democontroller.cpp
Labels
To position 2D labels on top of 3D components, the controller creates a TransformTracker for each label. The list of labels is exposed to QML by the [labels ] property in the controller.
On the QtQuick UI layer, this property is used as a model for a Repeater element that creates a QMLItem for each label:
1 | |
Filename: cluster_demo/qml/SceneView.qml
Animations
The controller creates a AnimationPlayer for each animation that can be controlled by the user. The list of animations is exposed to QtQuick by the [DemoController::toggleActions], [DemoController::sliderActions] and [DemoController::playOnceActions] properties in the controller.
On the QtQuick layer, these properties are used as models for Repeater elements, that create a control (switch, slider or button) for each action:
1 | |
Filename: cluster_demo/qml/SettingsPane.qml
Static Scenes Mode
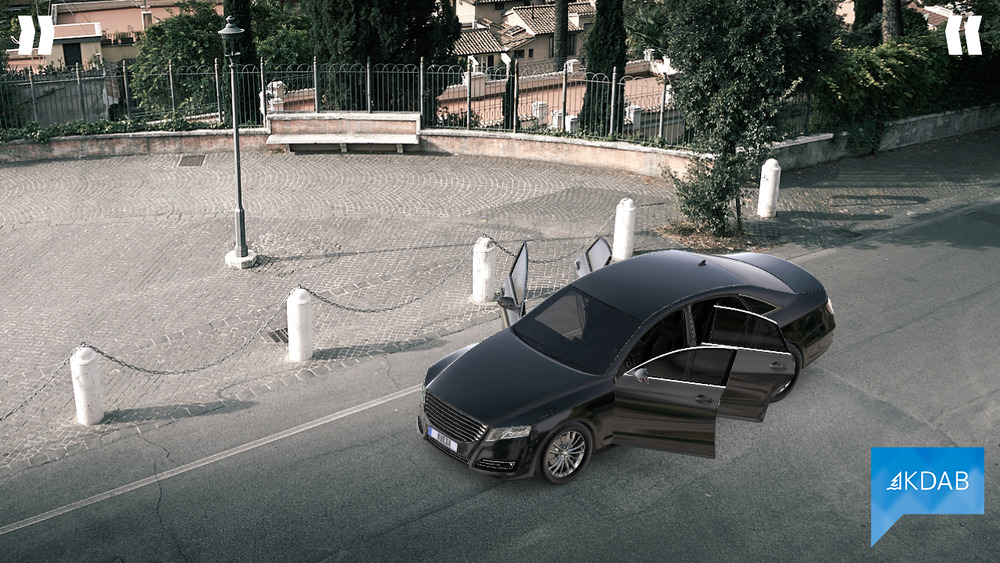
The static scene mode demonstrates loading glTF files and playing back pre-defined animations.
Driver Assistance Mode
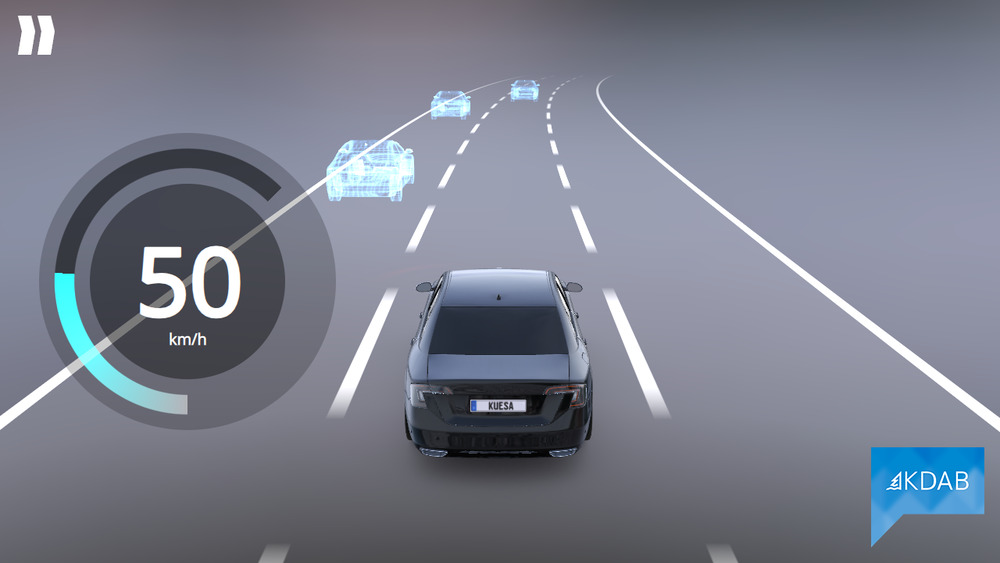
The driver assistance mode combines a scene loaded from a glTF file with dynamically created geometry.
Controller
The controller loads the glTF file containing the car entities and initializes data structures describing the path of the road.
Road Geometry
The road is defined by a loop made of cubic Bezier splines. This information is exposed by the controller via its roadModel property.
The actual mesh is created by RoadMesh, a custom Qt3DRender::QGeometryRenderer subclass. In the scene QML file, a NodeInstantiator creates an entity with a RoadMesh component for each road segment:
1 2 3 4 5 6 7 8 9 10 11 12 13 14 15 16 | |
Filename: cluster_demo/qml/DriverAssistance.qml
Robot Cars
We use GPU-based instancing to quickly draw all the robot cars meshes with a single draw call. We do this by adding a MeshInstantiator node to the scene:
1 2 3 | |
Filename: cluster_demo/driverassistcontroller.cpp
Animating the Scene
To animate the scene, the controller adds a Qt3DLogic::QFrameAction component to the scene, and connects its triggered signal to the update handler, so that it's called on every frame:
1 | |
Filename: cluster_demo/driverassistcontroller.cpp
The handler updates the transformation matrices for the robot cars:
1 2 3 | |
Filename: cluster_demo/driverassistcontroller.cpp
it also updates the transforms for the main car and for the camera.
Navigation Mode
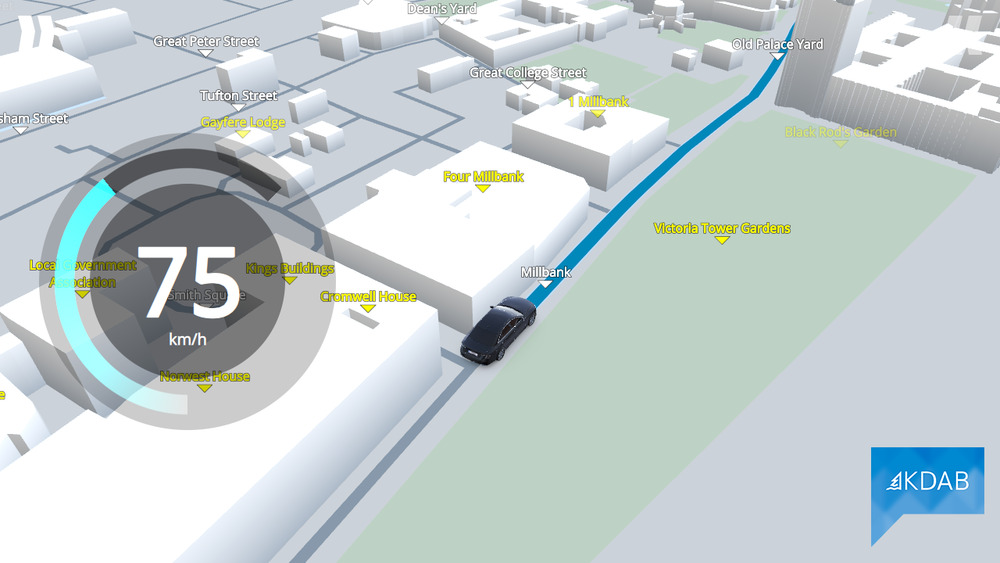
The navigation mode combines a scene loaded from a glTF file with dynamically created geometry created from an Open Street Map file.
Controller
The controller loads the glTF file containing the car entity and parses an Open Street Map file.
Map Geometry
The mesh for the map is created by the OSMMesh, which implements the Qt3DRender::QGeometryRenderer component. We add an entity using this component to the scene:
1 2 3 4 5 6 7 8 9 10 11 12 13 | |
Filename: cluster_demo/qml/Navigation.qml
Buildings
In addition to the map, the Open Street Map file also describes areas such as parks, lakes or buildings. The controller builds data structures for these and exposes them via the areaModel property.
The OSMAreaMesh class creates meshes for the areas. In the scene, we use a NodeInstantiator entity to create an entity with this component for each of the areas:
1 2 3 4 5 6 7 8 9 10 11 12 13 14 15 16 17 18 19 20 21 22 23 24 25 26 27 28 29 30 31 | |
Filename: cluster_demo/qml/Navigation.qml
Updated on 2023-07-03 at 11:02:17 +0000