Multiview Rendering
This example shows how to use VK_KHR_multiview to render multiple views (typically left/right eye for VR) in a single render pass. Multiview is dramatically more efficient than rendering each view separately because it avoids duplicating draw calls, state changes, and vertex processing. The GPU renders to multiple texture array layers simultaneously, with shaders accessing gl_ViewIndex to differentiate between views.
The example uses the KDGpuExample helper API for simplified setup.
Overview
What this example demonstrates:
- Enabling and using VK_KHR_multiview extension
- Creating texture arrays as multiview render targets (2 layers = 2 views)
- Configuring render passes with view masks
- Accessing
gl_ViewIndexin shaders for per-view transformations - Displaying both views side-by-side on screen
Use cases:
- Virtual Reality (VR) stereo rendering (left/right eyes)
- Augmented Reality (AR) stereo displays
- Cube map generation (6 views in one pass)
- Shadow cascades (multiple shadow maps)
- Split-screen rendering
Vulkan Requirements
- Vulkan Version: 1.1+ (multiview promoted to core)
- Extensions: VK_KHR_multiview (core in 1.1)
- Features:
multiview,multiviewGeometryShader,multiviewTessellationShader(optional) - Limits: Check
maxMultiviewViewCount(typically 6+)
Key Concepts
Multiview Rendering:
Traditional stereo rendering requires two passes:
1 2 3 4 | |
Multiview renders both views simultaneously:
1 2 3 4 | |
Benefits:
- ~50% reduction in CPU overhead (one set of draw calls)
- Shared vertex processing (GPU processes vertices once, broadcasts to views)
- Better cache coherence
- Fewer state changes
Spec: https://registry.khronos.org/vulkan/specs/1.3-extensions/man/html/VK_KHR_multiview.html
View Index:
In shaders, gl_ViewIndex (GLSL) or SV_ViewID (HLSL) indicates which view is being rendered:
1 2 3 4 5 6 7 | |
For VR, typically:
- View 0 = Left eye transform
- View 1 = Right eye transform
Texture Array Layers:
Multiview writes to texture array layers (slices):
- 2D array texture:
extent = {width, height, arrayLayers=N} - Each view renders to one layer
viewMask = 0b11→ Render to layers 0 and 1- Later, each layer can be sampled/displayed independently
Spec: https://registry.khronos.org/vulkan/specs/1.3-extensions/man/html/VkImageCreateInfo.html
Implementation
Creating Multiview Texture Array:
1 2 3 4 5 6 7 8 9 10 11 12 13 14 15 16 17 18 19 20 21 22 23 24 25 26 27 28 29 30 | |
Filename: multiview/multiview.cpp
Key configuration:
arrayLayers = 2: Two views (left/right)- Both color and depth need array layers
usage: ColorAttachmentBit + SampledBit (render to, then sample from)
Configuring Multiview Render Pass:
The render pass is configured with viewMask to specify which views are rendered. The viewMask = 0b11 (binary) enables views 0 and 1. For multi-view rendering, the same vertex/index buffers are rendered to multiple view layers automatically.
Shader Access to View Index:
Typically you would use different per eye camera matrices.
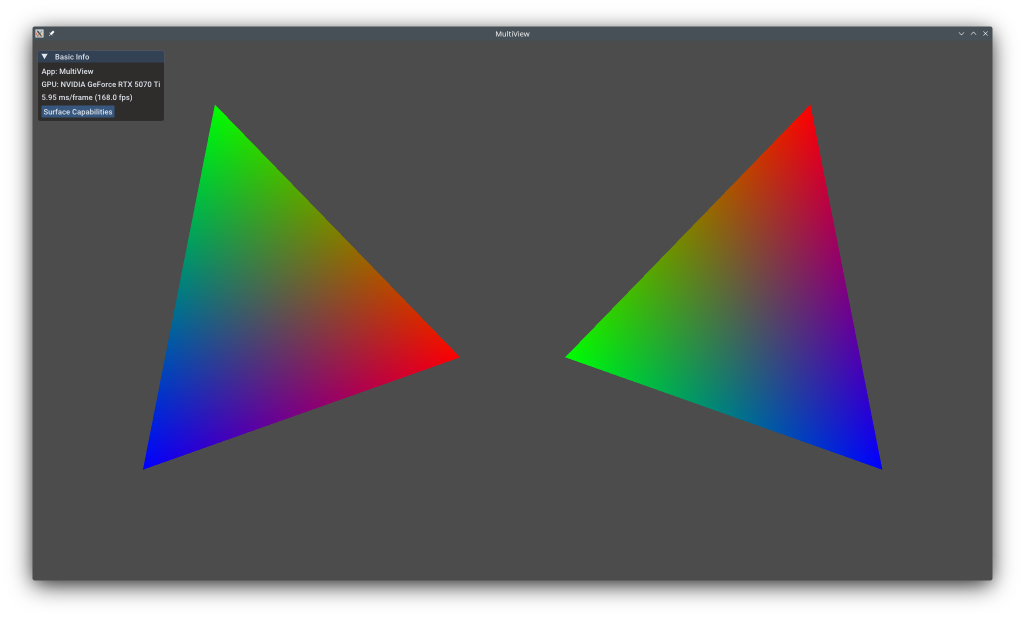
For the sake of simplicity, in this example we just change the rotation direction of our triangle for each eye.
1 2 | |
Filename: multiview/rotating_triangle.vert
The vertex shader uses gl_ViewIndex to select which direction to rotate the triangle.
The Multiview Render pass will fill both layers of the Texture2DArray attachment.
Multiview pipeline creation:
1 2 3 4 5 6 7 8 9 10 11 12 13 14 15 16 17 18 19 20 21 22 23 24 | |
Filename: multiview/multiview.cpp
Note the viewCount parameter which tells how many views we will be rendering to for multiview rendering.
Multiview rendering:
1 2 3 4 5 6 7 8 9 10 11 12 13 14 15 | |
Filename: multiview/multiview.cpp
Full-Screen Display Pass:
After multiview rendering, a full-screen pass displays both views side-by-side by sampling from each array layer.
If we have a Stereo display and stereo capable GPU, we could have used a Swapchain with texture arrays directly. This is what the Multiview Stereo Swapchain does.
For this example however, we will display a side by side view of each texture array entry.
To do so, we will display 2 quads side by side and sample from the texture array.
Push Constants for Layer Selection:
The full-screen display fragment shader uses a push constant to select which texture array layer (eye) to sample from:
1 2 3 4 5 6 7 8 9 10 11 | |
Filename: multiview/fullscreenquad.frag
When displaying, push constants specify which texture array layer to sample from.
Pipeline Configuration:
1 2 3 4 5 6 7 8 9 10 11 12 13 14 | |
Filename: multiview/multiview.cpp
Push constant ranges must be declared in the pipeline layout.
1 2 3 4 5 6 7 8 9 10 11 12 13 14 15 16 17 18 19 20 21 22 23 24 25 26 27 28 29 30 31 32 33 34 35 36 37 38 39 40 | |
Filename: multiview/multiview.cpp
Performance Notes
Performance Gains:
- CPU: ~40-50% reduction in driver overhead (one set of draw calls)
- GPU: Vertex shader runs once per vertex (broadcast to all views)
- Bandwidth: Same as multi-pass (writing to multiple layers)
- Memory: Texture array memory = single texture × layer count
When Multiview Helps Most:
- CPU-bound scenarios (many draw calls)
- Vertex-heavy scenes (complex geometry)
- Shared geometry between views (same objects, different cameras)
Limitations:
- Fragment shaders still run per-view (can't share fragment work)
- Geometry/tessellation shaders may be less efficient (check hardware support)
- View-dependent effects (reflections) need per-view computation
Mobile Optimization:
- Tile-based renderers benefit greatly (fewer passes)
- On-chip tile memory shared across views
- Reduced memory bandwidth for geometry data
VR Considerations
For VR rendering:
- Eye Separation: Calculate left/right view matrices with interpupillary distance (IPD ~64mm)
- Lens Distortion: Apply post-process distortion correction per-eye
- Foveated Rendering: Higher resolution at gaze center (combine with variable rate shading)
- Asynchronous Timewarp: Reproject frames for reduced latency
See Hello XR (OpenXR VR Application) for complete OpenXR integration example.
See Also
- Multiview Stereo Swapchain - Extended stereo rendering with camera controls
- Hello XR (OpenXR VR Application) - Full OpenXR VR application
- Hello XR Multiview - OpenXR with multiview optimization
- Render to Texture - Multi-pass rendering fundamentals
- VK_KHR_multiview Spec - Official extension documentation
- Multiview Best Practices - Oculus guide
Further Reading
- Stereo Rendering - Stereoscopic 3D fundamentals
- OpenXR Specification - Cross-platform VR API
Updated on 2026-07-16 at 00:01:15 +0000